Discover everything you need to know about growing ranunculus successfully from the best planting time by zone to expert tips for bigger, longer-lasting blooms. Learn how to avoid common mistakes, boost flower production, and grow florist-quality ranunculus in your own garden.
Growing ranunculus has become one of my favorite spring gardening rituals. These rose-like blooms offer vibrant color, delicate layers, and long vase life, making them a must-have in any flower bed. Many gardeners are intimidated by ranunculus, thinking they’re too delicate or suited only to mild climates, but with a bit of guidance, they thrive across much of the U.S.
Even in challenging climates like Florida or colder zones like 5 and 6, I’ve found that a few timing adjustments and planting tricks can make a world of difference. Whether you’re a backyard grower or a cut flower enthusiast, growing ranunculus rewards you with a dazzling display worth the effort.
Even in challenging climates like Florida or colder zones like 5 and 6, I’ve found that a few timing adjustments and planting ranunculus the right way can make a world of difference. Whether you’re a backyard grower or a cut flower enthusiast, growing ranunculus rewards you with a dazzling display worth the effort.
In This Article
Growing Ranunculus the Right Way: Quick Start Guide
Growing ranunculus successfully starts with understanding their needs and tailoring your approach to your local climate. Over the years, I’ve learned that timing and soil prep are everything. Whether you’re a first-time gardener or adding ranunculus to your spring lineup, these foundational tips will help you get it right from the start.
Start with Quality Corms and the Right Prep
Healthy ranunculus begins with firm, plump corms. I always soak mine for 4 hours in room-temperature water to rehydrate them, then pre-sprout them in shallow trays filled with moist peat moss. I keep these trays in a cool, dark place (around 50–55°F) for 10–14 days. This jumpstarts root development before they ever go into the ground, one of the most important steps I’ve found for growing ranunculus with strong stems and vibrant blooms.
Soil, Spacing, and Sunlight: Set Them Up for Success
Choose a well-draining soil, ideally loamy and rich in compost. I grow my ranunculus in raised beds and large containers spaced about 5 inches apart. They love full sun but appreciate some light afternoon shade in warmer zones. In USDA zones 8–10, plant in fall for spring blooms. For zones 4–7, wait until after the last frost to plant.
Water, Feed, and Watch Them Thrive
Water deeply once a week, allowing the soil to dry slightly between watering. I feed with a balanced flower fertilizer every two weeks once the foliage emerges. Regular monitoring helped me catch issues early whether it’s fungal problems from overwatering or stunted growth from poor nutrition.
Can You Grow Ranunculus from Cut Flowers?
Unfortunately, you can’t grow ranunculus from cut flowers. They don’t root like some plants do from stems. To start growing ranunculus, you’ll need to plant Ranunculus Corms or, less commonly, grow from seed. I’ve seen many new gardeners attempt to propagate from floral bouquets, only to be disappointed. Always begin with fresh, healthy corms for the best results.
Choosing the Right Ranunculus Type for Your Zone
When it comes to growing ranunculus, matching the right variety to your USDA zone is key to success. Over the years, I’ve trialed multiple cultivars in different regions, and I’ve found that not all ranunculus types perform equally well across climates. Choosing the right one makes a dramatic difference in bloom quality and plant health.
Best Varieties for Your Region
Two standout varieties in my experience are Tecolote and Amandine. Tecolote ranunculus produces large, ruffled blooms and thrives in zones 7–9. I grow them in raised beds here in zone 8, where they perform beautifully with full sun and excellent drainage.
If you’re gardening in a humid or warmer climate like the Southeast, Amandine is your best friend. It’s bred for better heat tolerance and humidity resistance, which makes it ideal for Southern growers. I’ve grown Amandines in more moisture-prone beds without any rot issues something Tecolote struggled with in the same conditions.
What Zone Is Best for Ranunculus?
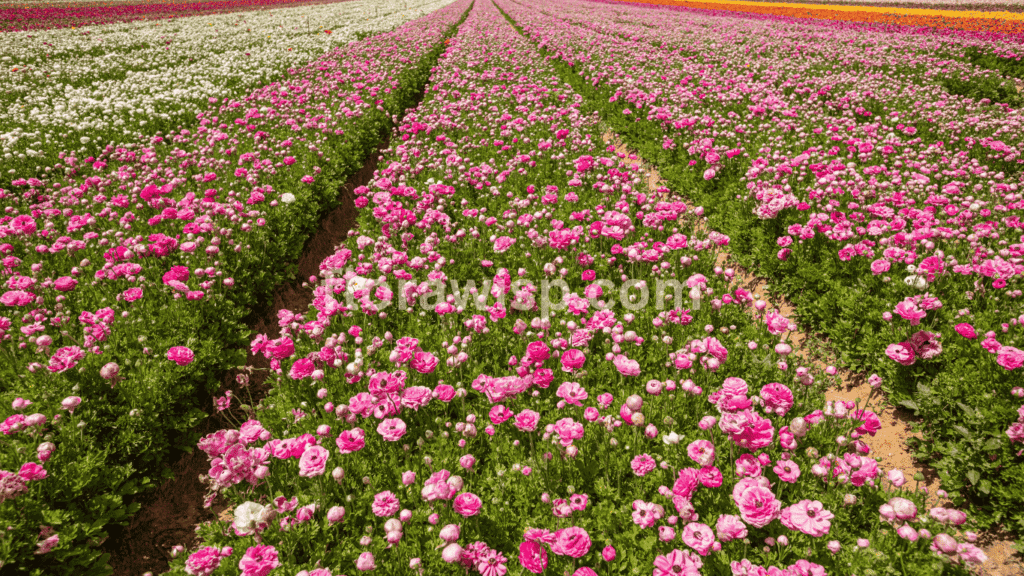
Ranunculus grows best in USDA zones 7 through 9, where fall planting leads to lush, early spring blooms. In these zones, corms can stay in the ground all winter and push out strong stems when spring arrives. That’s why ranunculus is often seen thriving in Southern California flower farms.
If you’re in zones 4–6, ranunculus can still be grown, but with some adjustments. I recommend pre-sprouting indoors and transplanting after the last frost. Use row covers to protect from temperature drops.
What’s the Coldest Temperature Ranunculus Can Tolerate?
Based on both research and my experience, ranunculus can tolerate brief exposure to cold down to 25°F (-4°C) once established, but young sprouts are sensitive. I’ve lost early plantings to unexpected cold snaps, so I always use frost cloth in early spring or late fall.
When to Plant Ranunculus by USDA Zone (4–9)
If there’s one thing I’ve learned from years of growing ranunculus, it’s that planting time makes all the difference. These cool-season bloomers thrive when their roots develop in mild temperatures and their foliage grows before spring heat kicks in. But success depends heavily on your USDA zone and planting too early or too late can mean no flowers at all.
Zone 4: Tread Carefully with Spring Starts

In USDA Zone 4, winters are long and hard. Ranunculus isn’t winter-hardy here, so outdoor fall planting isn’t an option. I recommend pre-sprouting corms indoors in early April, then transplanting them outside in raised beds or containers once the threat of frost has fully passed, usually late April to early May. Use row covers or cold frames to protect young plants if a late frost threatens.
Zone 5: Late March to Early April
Growing ranunculus in Zone 5 is possible with some caution. Like Zone 4, you’ll want to avoid fall planting. I’ve had great success starting indoors in March and transplanting outdoors in early April. Raised beds warm faster and allow for earlier planting. Mulch helps retain moisture and regulate early spring temperature swings.
Zone 6: Mid to Late March
In Zone 6, you’re in the sweet spot for spring planting. You can pre-sprout corms in early March and plant out by mid-to-late March. Choose a sunny, sheltered location with well-drained soil. Ranunculus does well in cold frames here, and with good timing, you’ll enjoy April or May blooms.
Zone 7: Dual Season Flexibility
Zone 7 gardeners have the advantage of both fall and spring planting options. I’ve had the best results planting in late October, with blooms appearing as early as March. But if you miss the fall window, early March planting works too. Protect fall plantings with frost cloth during cold snaps.
Zone 8: Late October to Early November
This is ideal ranunculus territory. Fall-planted corms in Zone 8 overwinter beautifully and push up blooms by early spring. I plant mine in late October, cover them lightly with mulch, and rarely need frost protection. Growing ranunculus here is about timing and drainage—keep the soil loose and elevated.
Zone 9: Early to Mid-October
In Zone 9, fall planting is a must. Corms go in the ground in early October, and I always apply a light mulch to shield them from temperature spikes. Growing ranunculus here requires selecting heat-tolerant varieties like Amandine and ensuring excellent drainage to avoid rot during mild winters.
Ranunculus corms typically take 90–100 days to bloom after planting, depending on temperature and variety. Understanding your ranunculus hardiness zone ensures you plant at the right time for optimal root development and floral performance.
Regional Planting Guide: Timing for Your State
Understanding the nuances of growing ranunculus in your specific region can make all the difference between a thriving flower bed and disappointing results. I’ve grown ranunculus across various climates, and adapting your timing and method to local conditions is crucial. Here’s a breakdown to help you grow ranunculus more successfully based on where you live in the U.S.
Planting Ranunculus In Georgia
Fall planting is ideal here. I plant my ranunculus corms in late October through early November, giving them time to root before cold sets in. A 2–3 inch mulch layer protects the corms during brief frosts. In my experience, fall-planted ranunculus bloom beautifully by late February.
Planting Ranunculus In Seattle (Pacific Northwest)
With frequent rain and cold, spring planting is safest in Seattle. I recommend planting pre-sprouted corms in March, using containers with excellent drainage. Ranunculus struggles in soggy soil, so raised beds or pots are your best bet.
Planting Ranunculus In Michigan
Start your ranunculus indoors in early March using trays with peat moss. I use grow lights to give mine a healthy head start before transplanting outdoors after frost, usually in late April. A cold frame helps harden them off gradually.
Planting Ranunculus In Ohio
Follow Zone 6 guidelines. Pre-sprout indoors in early March, and plant out by late March to early April. Frost cloth is essential if temperatures dip suddenly.
Planting Ranunculus InTexas
North Texas: Fall planting works best late October to early November. South Texas: Due to milder winters, I plant in early December for blooms by February. Amandine varieties handle the heat better in southern areas.
Planting Ranunculus In Utah
In Utah’s variable climate, I plant pre-sprouted corms outdoors in early April. In higher elevations, mulching and wind protection are vital. Raised beds warm quicker and prevent spring rot.
Planting Ranunculus In Colorado
Due to late frosts, I wait until mid to late April to transplant. Raised beds and row covers make a huge difference in warming the soil and shielding sprouts from chilly nights.
Planting Ranunculus In Florida
Traditional ranunculus struggles here due to heat. I grow mine in containers placed in partial shade, starting as early as December. I avoid heavy rain and use a well-draining potting mix. They bloom beautifully by February.
How to Grow Ranunculus Bulbs Successfully
When it comes to growing ranunculus, starting with healthy ranunculus bulbs and prepping them properly can make all the difference in bloom quality. Over the years, I’ve learned that attention to detail during the early stages sets you up for a vibrant spring display.
Soaking and Pre-sprouting
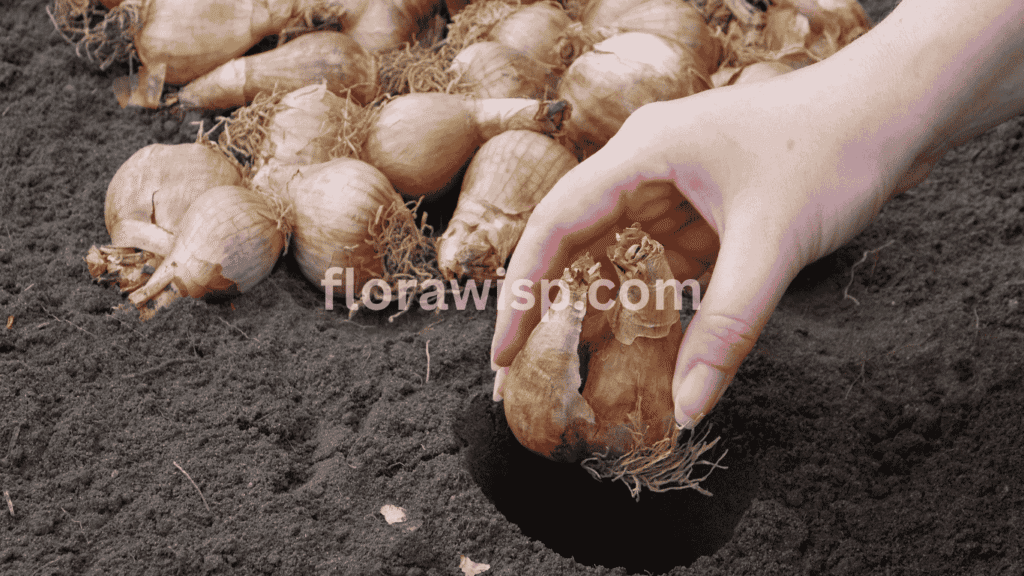
Ranunculus bulbs are technically small, claw-shaped structures that need to be rehydrated before planting. I always soak mine for 4 to 6 hours in room-temperature water. They double in size and become noticeably plumper.
Next, I pre-sprout them in trays filled with lightly damp peat moss. I place the tray in a cool, dark place (50–55°F) for 10–14 days. This step allows roots to form before planting, giving them a head start in the garden.
Planting Tips for Healthy Growth
Once pre-sprouted, I plant each corm claw-side down, about 2 inches deep and 4 to 6 inches apart. Spacing is critical for air circulation and preventing rot. Choose a spot with full sun and excellent drainage. I amend my beds with compost and coarse sand to create the ideal loamy structure.
After planting, water gently and consistently about once a week, depending on rainfall. During dormancy (after blooming), ease off watering to prevent rot. I’ve seen many beginners lose plants by either overwatering or letting pre-sprouted corms dry out.
Common Mistakes to Avoid
From my experience, the top three missteps when growing ranunculus are:
- Planting too deep or too shallow
- Ignoring drainage (especially in clay soils)
- Overwatering before or after dormancy
With proper prep and care, growing ranunculus from corms leads to lush stems and long-lasting blooms.
Growing Ranunculus from Seed: Is It Worth It?
Growing ranunculus from seed is possible but far more demanding than starting from corms. I’ve attempted it several times and succeeded only when I had the right setup in my greenhouse.
Germination Requires Patience and Precision
Ranunculus seeds are small and slow to germinate. You’ll need consistent warmth and moisture. I sow mine in trays filled with seed-starting mix and maintain a steady 60–65°F temperature. Germination takes 14–21 days, and bottom heat is essential. I use a heating mat and cover the trays with a humidity dome, misting daily to avoid dry-out.
Greenhouse vs. Indoor Success
Without a greenhouse, maintaining humidity can be tricky. Even with excellent care, seed-grown ranunculus often produces fewer and later blooms than corm-grown plants. In my trials, the flowers were smaller and the stems less vigorous.
If you’re short on corms or enjoy experimenting, give seeds a try. But for dependable, florist-quality blooms, growing ranunculus from corms remains the most reliable path.
Ranunculus Growing Stages: From Corm to Cut Flower
One of the most rewarding parts of growing ranunculus is watching them evolve from small claw-like corms into full, ruffled blooms. Understanding each stage helps you time your care properly and catch issues before they become problems. Based on my years of gardening across Zones 6–9, here’s a detailed timeline of the ranunculus life cycle:
Stage 1: Pre-Sprouting (10–14 Days)
I always begin by soaking my corms and pre-sprouting them in trays of moist peat moss for 10–14 days in a cool, dark place around 50–55°F. Tiny white roots begin to emerge, signaling the start of healthy development. This step gives a strong head start to the growing ranunculus process, especially in cooler climates.
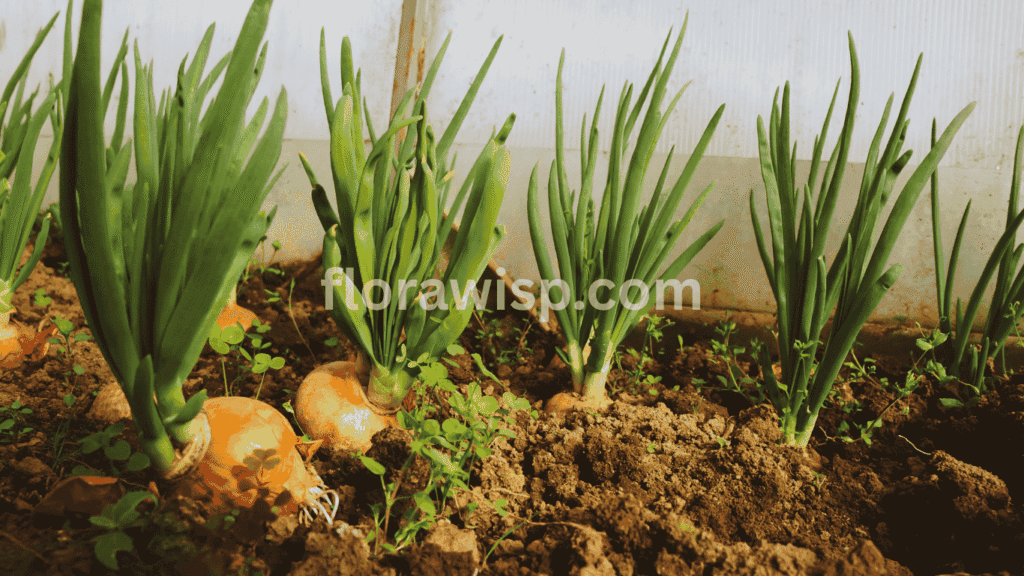
Stage 2: Early Foliage (3–4 Weeks)
After planting pre-sprouted corms, you’ll notice low, bushy green foliage forming within 2 weeks. This leafy stage lasts around 3–4 weeks. During this time, I ensure they get at least 6 hours of sunlight daily and water them consistently to promote strong root growth.
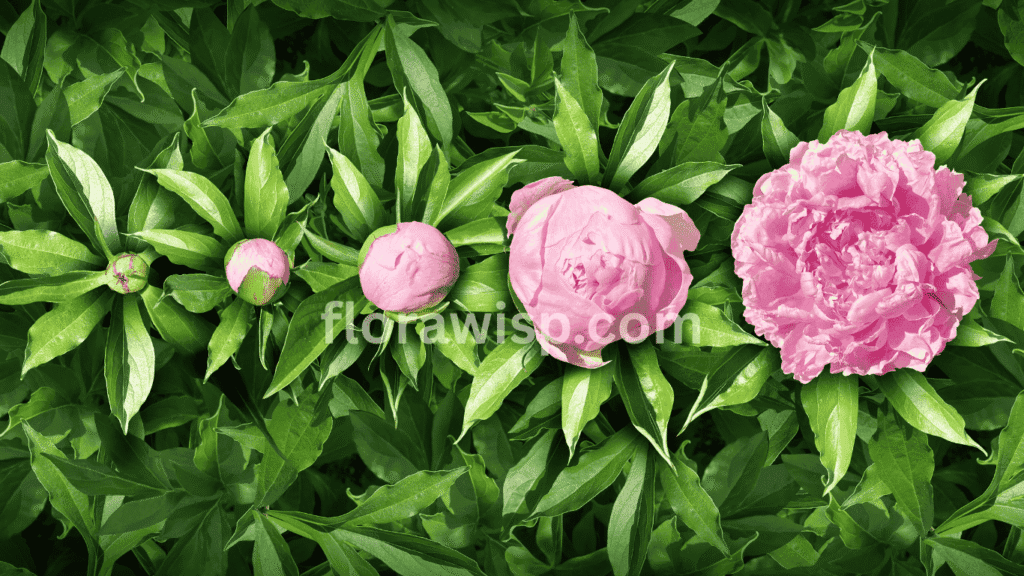
Stage 3: Budding (Weeks 5–7)
This is when growing ranunculus becomes exciting. Around week 5, small buds begin to appear, depending on your zone and weather. Warm days and cool nights help buds form faster. I start feeding with a phosphorus-rich bloom booster every 10–14 days.
Stage 4: Full Bloom (8–12 Weeks)
By weeks 8 to 12, you’ll see lush, colorful blooms. Harvesting the flowers every 2–3 days not only refreshes your bouquets but also encourages continuous blooming. I use sharp shears and always cut early in the morning for best vase life.
Stage 5: Dormancy (Late Spring to Early Summer)
Yellowing foliage signals that your ranunculus is entering dormancy. This stage can sneak up quickly in warm zones. Stop watering once the leaves begin to die back. I dig up and store corms in breathable containers if replanting is planned.
Monitoring each stage closely gives you control over blooming success and helps identify potential setbacks early.
Why Your Ranunculus Might Not Thrive
Even seasoned gardeners run into issues when growing ranunculus. These plants are particular about temperature, soil, and moisture. Getting one wrong can delay or derail blooming. Let me walk you through some common problems and how I’ve solved them over the years.
Yellowing Leaves
This is one of the most common concerns. If leaves yellow too early in the season, it often signals overwatering, poor drainage, or nutrient deficiencies. I always improve my beds with compost and sand to boost drainage and prevent root rot. A balanced 10-10-10 fertilizer helps strengthen foliage without promoting leggy growth.
Rotting Corms or No Sprouting
In my early gardening days, I lost entire batches to rotting corms from planting into wet, cold soil. Always pre-sprout your corms and make sure the planting area drains well. Avoid heavy clay soil unless amended with organic matter and grit.
No Buds or Flowers
If your ranunculus isn’t budding, it could be due to planting too late or extreme temperature swings. Sudden cold snaps can shock the plant, halting bud development. I’ve had success using floating row covers to shield young plants in late winter.
Also, lack of phosphorus can reduce flowering. Use a bloom booster with a high middle number (like 5-10-5) every two weeks once foliage is established.
Buds That Fail to Open
This usually happens due to temperature stress or low light. If you’re growing ranunculus in containers, move them to a sunnier location. Raised beds or well-positioned garden spots receive better airflow and consistent sun exposure, both crucial for healthy bloom development.
Growing ranunculus requires patience and observation but once dialed in, these plants are among the most rewarding cut flowers you can grow.
Is Ranunculus a Perennial in Your Zone?
Ranunculus can act as a tender perennial in zones 8–10, but in zones 4–7, treat them as annuals unless you dig and store the corms. I’ve successfully overwintered ranunculus in zone 7b using mulch and row cover.
In colder zones, lift corms after leaves yellow. Dry them for 2–3 days, then store in peat moss in a paper bag in a cool, dark place. Container planting also allows you to move them indoors before frost.
FAQs
Q. How tall does ranunculus grow?
Ranunculus typically grows 12 to 18 inches tall, depending on the variety and growing conditions. In my experience, Amandine and Tecolote varieties consistently reach around 16 inches when grown in full sun with well-drained soil and fed every two weeks with a balanced flower fertilizer. Taller types benefit from light staking to keep stems upright, especially during heavy bloom periods or windy days. If you’re aiming for long stems for cut flowers, give them plenty of sun and avoid overcrowding. Airflow plays a role in strong vertical growth.
Q. Where do ranunculus grow best?
Ranunculus grows best in cool-season conditions with full sun, rich, well-drained soil, and low humidity. From my years of growing them, zones 8–10 offer ideal conditions for fall planting, while gardeners in zones 4–7 should plant in early spring after the last frost. In areas with heavy rainfall, raised beds or containers provide the drainage ranunculus needed to prevent rot. They also perform well in climates with mild winters and warm springs. Avoid overly shaded spots. These plants love sunlight and need it to bloom to their full potential.
Q. Are ranunculus easy to grow for beginners?
Yes, growing ranunculus is beginner-friendly if you follow the key steps proper pre-sprouting, timing, and soil prep. When I started growing ranunculus, I had success by soaking the corms for 4–6 hours, pre-sprouting them in peat moss, and planting them in well-drained beds after the frost. While they’re not as carefree as marigolds or zinnias, they’re very manageable with basic care. Avoid waterlogged soil, protect from frost, and they’ll reward you with florist-quality blooms even on your first try.
Q. When to plant ranunculus in zone 7b?
Plant ranunculus in zone 7b in late October through mid-November for best results. Fall planting allows the corms to establish roots before winter. I always mulch my beds heavily and use frost cloths or row covers during colder nights. This method has consistently given me healthy early spring blooms. If you miss the fall window, early spring planting can still work just be sure the soil is no longer frozen and temperatures are steadily above 40°F.
Conclusion
Growing ranunculus is an enriching experience. These flowers offer professional-level beauty in a home garden setting. With just a little planning, the right timing, and attention to detail, you can enjoy their luxurious blooms year after year.
If you’ve never grown them, this is the season to try. Once you harvest your first vase full, you’ll understand why creating a Ranunculus Bouquet has become such a beloved part of my gardening life.
References
University of California Master Gardener Program
North Carolina State Extension – Plant Toolbox
Royal Horticultural Society (RHS) – Ranunculus Care Guide
Gardener, M.Sc. Horticulture
Elara Bennet is a gardening writer from Austin, TX, passionate about sustainable lawns and blooms. Read full bio →