Ranunculus corms not blooming? Discover 9 proven tips I use in my Zone 7 garden to grow lush spring flowers plus expert pre-sprouting and buying tricks.
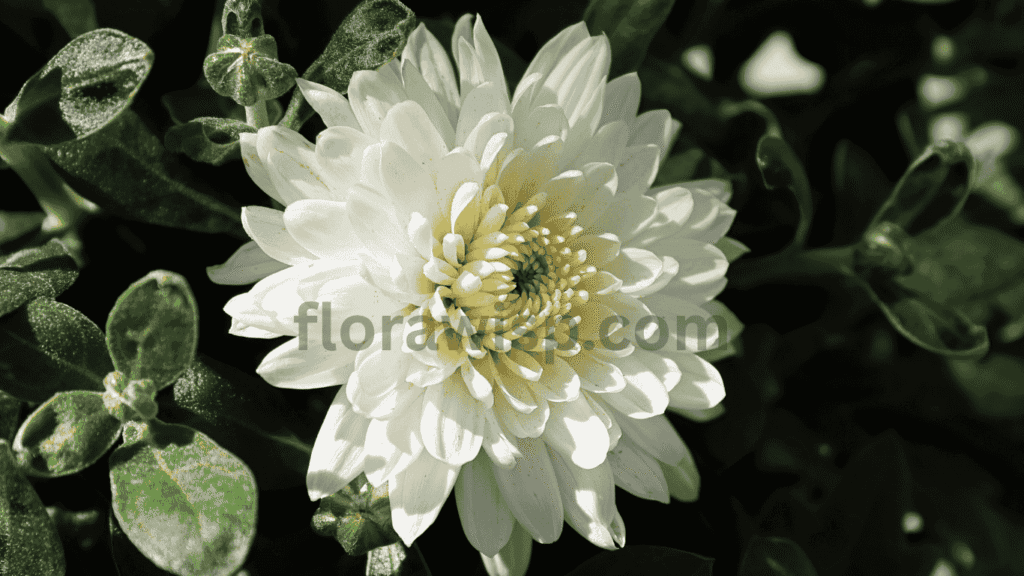
There’s something magical about ranunculus blooms dancing in the breeze each spring. Their rose-like petals, layered like tissue, make them the stars of my early-season flower beds. I remember my first time planting ranunculus corms. I had no idea those little claw-like nuggets could transform into such radiant blooms. But with care, timing, and proper planting, they always deliver.
In this guide, I’ll walk you through everything you need to know from choosing and buying quality ranunculus corms, to planting, storing, and even pre-sprouting for earlier blooms. If you’re looking to buy in bulk or explore rare varieties like Butterfly or Italian, you’re in the right place. You can also check out my detailed guide on Planting Ranunculus for a step-by-step breakdown of how to get the most vibrant blooms.
Stick with me to the end. I’ll share the same insider buying tips I give fellow gardeners and florist friends every spring.
In This Article
What Are Ranunculus Corms? Understanding the Basics
A Simple Introduction to Ranunculus Corms

At first glance, ranunculus corms may look like something better suited for the compost pile than your flower beds. They’re knobby, brown, and claw-like but don’t let their appearance fool you. These small underground storage structures are the powerhouse behind one of the most stunning spring flowers you’ll ever grow.
As someone who’s been growing ranunculus in my Zone 7 garden for over a decade, I can tell you with confidence: mastering corms is the first step toward success. Each season, I’m amazed by how much beauty these unassuming corms can produce when given the right care.
Ranunculus Corms vs. Bulbs: What’s the Difference?
One common mistake I see among beginners is confusing corms ranunculus with bulbs. Though both are used to grow flowering plants, they differ significantly. Bulbs, like tulips or onions, are made up of layered scales. In contrast, ranunculus corms are solid and compact, more like a tiny tuber with claw-like extensions. These “claws” are actually root buds, and they should always be planted facing downward.
Understanding this distinction is key, especially during planting, as upside-down placement can delay sprouting or even lead to rot.
How Ranunculus Corms Grow and Multiply
The lifecycle of a ranunculus flower corm is as fascinating as it is beautiful. After planting and sprouting, each healthy corm sends up multiple stems each loaded with full, layered blooms that last well into spring. What surprises many first-time growers is that ranunculus corms do multiply under the right conditions.
If you allow the foliage to die back naturally after blooming, the corm stores energy and often produces offsets of tiny new corms attached to the original. I gently dig these up once the foliage yellows, clean them off, and store them for next season. Over time, one corm can lead to a full bed of flowers, just one of the joys of Growing Ranunculus.
Timing the Lifecycle for Best Results
The growth cycle typically begins in fall or late winter with pre-sprouting, followed by active growth in early spring. By late spring or early summer, the plant dies back and enters dormancy. Understanding this natural rhythm has helped me optimize planting and storage timing, reducing losses and improving bloom rates year after year.
If you’re serious about growing ranunculus corms, mastering their biology is the first step toward consistent success.
Where to Buy Ranunculus Corms in the USA
As a long-time gardener who’s grown ranunculus for years, I’ve learned that the quality of your blooms starts with where and when you buy your ranunculus corms. If you’re looking to plant a healthy, vibrant display, don’t wait until the last minute. While local nurseries can be handy, they often carry limited stock and generic varieties that may not thrive in your USDA zone.

I always recommend ordering ranunculus corms from specialized online vendors well in advance ideally in late summer through early fall. This timing gives you access to a wider selection of colors and premium, size-graded corms that are less likely to carry disease. Look for suppliers who clearly label their products by USDA zone compatibility and offer robust refund or replacement policies.
When I first started, I struggled to find corms that performed well in my region. Eventually, I discovered several California-based growers who not only offered a vast selection of ranunculus corms, but also shipped right on time for pre-sprouting in fall. Since then, my success rate has dramatically improved especially with varieties like ‘Amandine’ and ‘Cloni Success’ that thrive in my conditions.
A few things I always check before ordering:
- Customer reviews specific to plant quality and bloom success
- Shipping timelines that align with my planting window
- Whether the vendor offers region-specific advice or planting guides
If you’re searching terms like “ranunculus corms near me” or “where to buy ranunculus corms,” be cautious about buying from unfamiliar sources. Cheaper options can be tempting, but lower prices often mean smaller or poorly stored corms that may never sprout. It’s worth investing in trusted suppliers who understand the needs of U.S. gardeners and ship accordingly.
Pro tip: I always keep a shortlist of three to four reliable vendors bookmarked. This way, I can compare pricing, stock availability, and special varieties each season without scrambling at the last minute.
Whether you’re planting for bouquets, beds, or containers, your journey begins with healthy, well-sourced ranunculus corms. Taking the time to order from trusted suppliers pays off with strong growth and stunning blooms when spring arrives.
How to Choose the Best Ranunculus Corms for Planting
Choosing high-quality ranunculus corms is the first and most important step toward a successful blooming season. Over the years in my gardening journey across USDA Zone 8, I’ve learned that not all corms are created equal. Your success with ranunculus starts with what you put in the soil and that means knowing how to spot healthy corms and selecting the right varieties for your climate.
What Makes a Good Ranunculus Corm?
Look for firm, claw-shaped corms that feel dense in your hand. Avoid any that are soft, shriveled, or moldy. A good corm should be dry but not brittle, and the claws should be intact and facing downward when planted.
In my garden, I’ve noticed that larger ranunculus corms consistently produce more stems and fuller blooms. A jumbo or #1 grade corm can yield up to 8–12 stems per plant, while smaller ones may only give you 3–5. Investing in larger corms up front pays off with a much more impressive display come spring.
Varieties I Trust
I often rotate between Butterfly ranunculus corms and Italian ranunculus corms depending on the style of my beds for the season. Butterfly ranunculus have thinner, more whimsical petals that remind me of wildflowers; they’re ideal for cottage-style gardens or bouquet fillers. Italian types, on the other hand, are bold and romantic, with tightly layered petals in saturated colors. These are my go-to for focal points and flower arrangements.
Personally, I’ve had the most success with Amandine and Italian Tecolote varieties, especially in zones where winters are mild. For colder areas, look for cold-hardy ranunculus corms or ask vendors if they offer pre-sprouted options, which adapt better to early spring planting.
How to Buy Ranunculus Corms with Confidence
Always purchase your ranunculus corms from trusted suppliers who provide clear labeling, origin details, and storage instructions. Vendors who specialize in ranunculus often offer fresher, disease-free stock that hasn’t sat on a big-box shelf for weeks. Look for sellers who mention grading, storage temps, and bloom timing.
When choosing the best place to buy ranunculus corms, I recommend ordering early late summer to early fall is ideal. This not only ensures availability but also gives you time to pre-sprout before planting.
No matter your zone or experience level, healthy ranunculus corms are the heart of a flourishing garden. Take your time, source them wisely, and don’t be afraid to experiment with a few new varieties each year. You’ll be surprised how much joy they bring when spring arrives.
Buying in bulk? Wholesale & Bulk Ranunculus Corms Guide
If you’re planning to grow ranunculus corms for cut flowers, a wedding floral business, or to transform a large garden space into a spring spectacle, buying in bulk isn’t just smart, it’s essential. Over the years, I’ve learned that purchasing wholesale ranunculus corms not only saves money but also ensures uniformity across beds, better planning, and healthier blooms. It’s also the best way to ensure a consistent supply for crafting the perfect Ranunculus Bouquet that reflects your garden’s personality and seasonal rhythm.
Why Bulk Ranunculus Corms Make Sense for Growers

Ranunculus isn’t just a pretty flower, it’s a workhorse in the world of spring blooms. From experience, planting bulk ranunculus corms gives me the flexibility to experiment with succession planting, companion layouts, and even resale at local farmer’s markets and garden shows. Whether you’re managing a flower farm or starting a backyard cutting garden, the larger quantity lets you play with design, test performance across varieties, and create continuous bloom cycles from late winter through early spring.
Where I Source My Wholesale Ranunculus Corms
I usually place my wholesale orders by mid-to-late summer to secure the best selection and get them delivered fresh by early fall. This timing aligns perfectly with pre-sprouting indoors. My go-to sources for ranunculus corms wholesale are U.S.-based growers who specialize in large-scale flower production. Buying from domestic suppliers not only shortens shipping times but also ensures that the corms are well-adapted to American hardiness zones. I’ve had great results ordering amandine ranunculus corms wholesale especially for Zone 8 climates where early blooms matter most.
Tips When Buying Wholesale Ranunculus Corms
Always check if the vendor lists variety names, grading sizes, and zone compatibility. Trustworthy suppliers of wholesale ranunculus corms USA will often include specific care instructions, lot numbers, and storage guidelines. When I receive my bulk shipment, I inspect the corms immediately looking for firm, dry bodies and no signs of mold or rot. This habit has saved me from planting duds more than once.
Bulk buying ranunculus corms opens up a world of possibilities from large-scale landscaping to hosting your own spring bouquet stand. If you’re serious about growing quality ranunculus, investing in wholesale corms is a decision you’ll be glad you made.
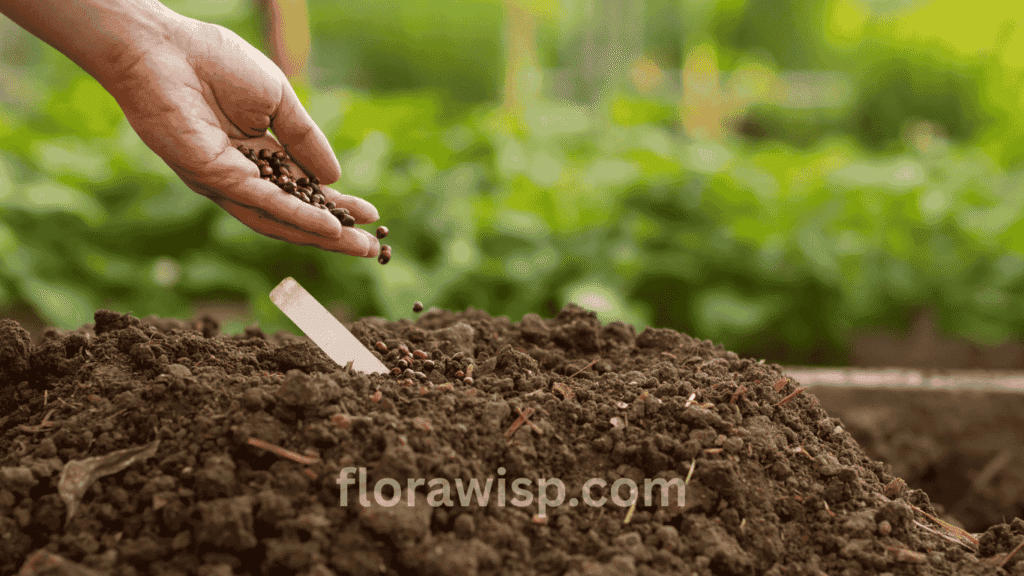
Soaking and Pre-Sprouting Ranunculus Corms
If you’ve ever struggled with poor germination or slow growth, there’s one step you might be skipping soaking and pre-sprouting your ranunculus corms. After years of trial and error, I’ve found this simple process dramatically improves both survival rates and bloom timing.
Why Soak Ranunculus Corms?

Ranunculus corms arrive dry and dormant, resembling tiny octopuses. Soaking softens the outer layers, rehydrates them, and signals it’s time to wake up. I soak my corms in clean, room-temperature water for exactly 4 hours, changing the water every hour to keep it oxygen-rich.
How long to soak ranunculus corms is a common question, and here’s my golden rule: never go beyond 6 hours. Anything more increases the risk of rot, especially in humid climates or poor airflow.
Step-by-Step Pre-Sprouting Method
Once soaked, I transfer the plump corms into shallow trays filled with a moist (but not soggy) seed-starting mix. Lay them with claws facing down, cover lightly, and store them in a cool, dark place (50–55°F). A basement or unheated garage works perfectly.
Over the next 10–14 days, you’ll see tiny white rootlets emerging. This is your sign that the pre-sprouting of ranunculus corms is successful and they’re ready for planting.
Real Results from Pre-Sprouting
From my own experience here in USDA Zone 7b, pre-sprouted ranunculus corms bloom 2–3 weeks earlier than those planted directly in the ground. They also show stronger growth, higher bloom counts, and better resilience to unexpected frosts.
This extra prep step may seem tedious, but the payoff is a longer bloom season and healthier plants especially for gardeners in cooler or variable climates.
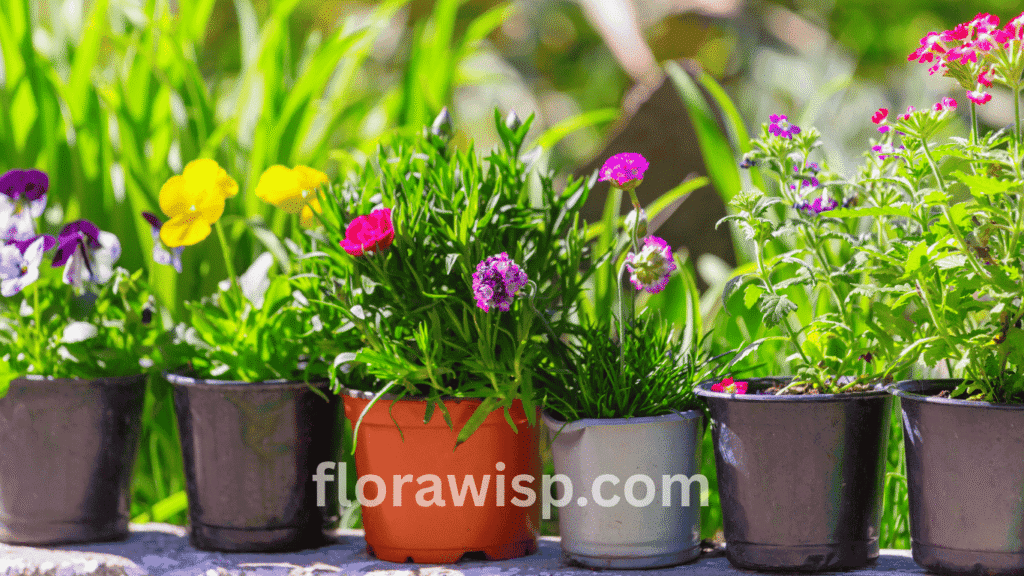
Planting Ranunculus Corms the Right Way
Once your corms have rootlets, it’s time to plant. Success with ranunculus depends heavily on planting technique and timing.
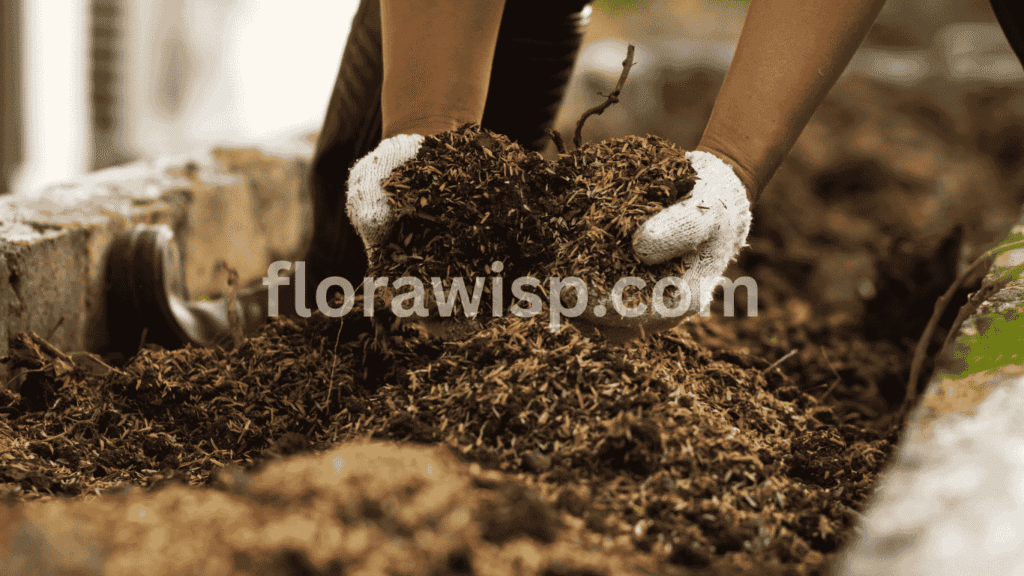
Prepping the Bed
I always start by enriching my garden bed with compost-rich, well-draining soil. Raised beds work beautifully, but any spot with loose, friable earth will do. Avoid soggy areas; ranunculus corms hate wet feet.
How to Plant Ranunculus Corms

Place each corm with claws facing down about 2 inches deep and 4–6 inches apart. Don’t overcrowd airflow matters just as much as sunlight. I’ve found this spacing optimal for both visual impact and plant health.
When to Plant Ranunculus Corms (By USDA Zone)
- Zones 8–10: Plant in fall for early spring blooms.
- Zones 5–7: Wait until late winter or early spring after the threat of hard frost passes.
Your planting time for ranunculus corms will directly affect when you see flowers, so coordinate with your zone’s last frost date for best results.
Sunlight and Mulching Tips
Ranunculus craves at least 6 hours of full sun daily. Less light = leggy stems and duller colors. After planting, I apply a thin mulch layer to retain moisture and block weeds without suffocating the crowns.
Through years of growing these beauties, I’ve learned that a little extra care at planting time pays off in lush, vibrant blooms that last for weeks.
How to Store and Save Ranunculus Corms After Bloom
Once your ranunculus plants have put on their vibrant spring show, it’s essential to give the corms the post-bloom care they deserve. In my Zone 7 garden, I’ve learned the hard way that skipping proper storage leads to rotted or dried-out corms the following season.
Step 1: Wait for Foliage to Yellow
As a general rule, I never rush the process. When the blooms fade, I allow the foliage to naturally yellow and die back. This final stage helps the ranunculus corms reabsorb nutrients for next year’s growth. Cutting too early often results in weaker blooms the following spring.
Step 2: Gently Lift and Dry the Corms
Once the foliage has died back completely, I use a hand fork to gently lift the corms out of the soil. Avoid using shovels, as they can damage the delicate outer layers. After removing excess soil by hand, I spread the corms in a single layer on a screen or mesh tray. I keep them in a shaded, well-ventilated area for 3 to 5 days. This step is crucial—ranunculus corms must be fully dry before storage to prevent rot.
Step 3: Store in a Cool, Dry Environment
For best results, I wrap each batch loosely in newspaper or place them in mesh onion bags. The storage area should maintain a consistent temperature between 40°F to 50°F with low humidity. I’ve found that wooden crates or cardboard boxes with straw also work well if you have a garage or basement that doesn’t freeze.
Avoid plastic containers at all costs; they trap moisture and ruin otherwise healthy corms. Airflow is non-negotiable.
Bonus: Healthy Corms Multiply
Over time, I noticed something fascinating: well-cured ranunculus corms tend to multiply. Some seasons, I dig up one original and find three or four baby corms attached. By saving and replanting these, I’ve expanded my ranunculus bed significantly without spending extra money. Proper curing and storage truly pay off.
Butterfly and Italian Ranunculus Varieties
Every gardener has their favorites, and after experimenting for several years, I’ve come to love two specific types: Butterfly ranunculus corms and Italian ranunculus corms. Both offer stunning blooms but require different growing strategies to thrive.
Butterfly Ranunculus Corms
These corms are ideal for smaller garden beds or cutting gardens. I love how their shorter stems and delicate blooms fit beautifully in spring arrangements. In my Zone 7 garden, I plant butterfly ranunculus in partial sun, especially during warm springs. They do best when protected from early afternoon heat.
When buying butterfly ranunculus corms for sale, I always look for suppliers that offer pre-sprouted or vernalized options. These tend to bloom earlier and with more vigor.
Italian Ranunculus Corms: Big Blooms, Strong Stems

Italian varieties, like the Cloni series, are my go-to for wedding-style, peony-like blooms. These corms thrive when planted in late fall or very early spring in regions with mild winters. I prep the soil with aged compost and bone meal, and keep a light feeding schedule every two weeks during active growth.
Unlike butterfly types, Italian ranunculus prefer cooler conditions at the start and benefit from consistent moisture until bud formation.
Document, Observe, and Adjust
One of the best decisions I made as a gardener was to start documenting the growth habits of different ranunculus corms. Each season, I track bloom timing, stem length, pest issues, and soil response. This helped me fine-tune planting schedules and nutrient routines. If you’re just starting, plant a few of each type and observe. Let your garden teach you.
FAQs
Q. How long should you soak ranunculus corms before planting?
Soak ranunculus corms for 4 to 6 hours no longer to hydrate them safely before planting. This time frame softens the dry, claw-like corms and jumpstarts root development without risking rot. From my own planting schedule, I always change the water every hour and soak them indoors 10–14 days before my intended planting date. Skipping or overdoing this step often leads to uneven sprouting or fungal issues. Proper soaking has given me over 90% germination success with healthy early growth, especially when followed by pre-sprouting in trays.
Q. What’s the best method to store ranunculus corms?
After blooming, let ranunculus corms dry in a cool, shaded spot for a week, then store them in mesh or paper bags in a dry area around 40–50°F. I’ve used basement shelves with good airflow to keep mine viable for next season. Never seal them in airtight containers they’ll mold. I inspect mine monthly for any softness or rot. Based on trials, this method keeps corms firm and ready for replanting. If stored right, I’ve reused my corms for up to two additional seasons with strong flowering.
Q. Do ranunculus corms multiply over time?
Yes, ranunculus corms naturally multiply by producing small offsets at the base of mature corms. After a full bloom cycle, I often find 2–4 mini cormlets clustered around the mother corm. These can be separated and replanted the following season. To encourage multiplication, let the foliage die back fully and avoid lifting them too early. Good soil drainage and consistent post-bloom care have helped me triple my ranunculus corm count in one year especially with Amandine and Elegance varieties.
Q. Where’s the best place to buy ranunculus corms?
Buy ranunculus corms from trusted specialty nurseries or growers who offer fresh, size-sorted stock. I’ve had the best results ordering from U.S.-based bulb farms that list zone compatibility, size grades, and harvest dates. Avoid bargain sites or chain stores, where labeling is often wrong and corms are small or dried out. Reviews, customer photos, and climate match are key. I personally order my bulk corms in midsummer for early fall delivery to secure the healthiest stock.
Q. When should I plant ranunculus corms in my zone?
Plant ranunculus corms in fall (October–November) in USDA Zones 8–10, and in late winter (January–February) for Zones 5–7 after the danger of frost has passed. I start mine indoors in trays when snow still lingers, especially in Zone 6. Timing is everything early planting ensures longer stems and earlier blooms. I use my local frost date and daylight tracking to fine-tune planting each year. If you want reliable spring blooms, align planting with your last expected frost and add 12–16 weeks of growth time.
Conclusion
Growing ranunculus corms has added elegance and color to my spring garden every year. From soaking and pre-sprouting to saving them after bloom, every step becomes easier with experience. Whether you’re buying butterfly ranunculus corms or sourcing ranunculus corms for sale in bulk, make choices that suit your region and garden style.
I encourage you to experiment with varieties, try pre-sprouting, and share your garden stories. If you’re just starting out or want a refresher, don’t miss my full guide on Ranunculus Bulbs your next season could be your most colorful yet.
References
Gardenia.net / The Seed Collection
Sierra Flower Farm – Guide from Corm to Bloom
Renfrow Farms – Ranunculus Growing Guide
Gardener, M.Sc. Horticulture
Elara Bennet is a gardening writer from Austin, TX, passionate about sustainable lawns and blooms. Read full bio →